Tuesday, August 6, 2013

Fabulous Closet Makeover

My gosh peeps, have you SEEN Virginia’s closet makeover? Her $50 makeover?! Seriously, I’m so jealous!

If you haven’t seen it yet, I highly recommend heading over to check it out. You can find Virginia at LiveLiveDIY.


Source: LiveLoveDIY

Monday, August 5, 2013

Big Plans, Teeny Budget

I can't believe I'm about to do what I'm about to do. Seriously. Our master bedroom is SO not fit for public viewing it's not even remotely funny. BUT, I'm hoping that the public humiliation will end this cycle of procrastination and get my butt in gear!

Without further adieu, the (shamefully un-decorated) Master Bedroom.


Yes, I am only showing you a teensy part.  I know. It looks like a college bedroom.  It's sludge brown and melted milkshake brown.  With two silly little eyeball windows on the main wall, and one big one to the left in the photo.

I know I mentioned that we moved into this house almost a year ago (has it been a year already?!) At the time, I had big plans for just about every room in this house. Alas, time and money got away from me, and some, ahem, design disagreements, between The Man and I.

A couple of weeks ago, we both pitched in and got things straightened up and (mostly) put away. I took apart the computer and re-wired everything to mostly hide the ugly cords and clear off the top of my vanity. I swear that someday I will use it for it's intended purpose!

Aaand now that I've bored you to tears. Here's where I'm going with this room.
  1. The "focal' wall with those two teensy eyeball windows (what the heck am I supposed to do with those anyway?) will become a gorgeous deep blue. Specifically, Medieval Blue by Pantone. I won the paint last year in a blog contest, and have yet to use that particular color. I've got almost two quarts, so I'm pretty confident I'll get it done with what I've got. The Pantone paints have given really great coverage on all of my other projects, so, I'm just going to go for it.
  2. The current headboard will have the legs cut off and then will be mounted to the wall with a french cleat, slightly higher than where it sits now.
  3. Nightstands will get a fresh coat of creamy white paint. this is going to KILL The Man.
  4. Replace the plastic blinds with bamboo shades. Yet another thing The Man is not quite on board with. I think he still sees those horrid bamboo shades from the 70's with the avocado green yarn and brown fabric ties!
  5. Replace the current curtains (which go with the bedding from 2 sets ago) with something else. Yes, they will be hung high and wide.
  6. Remove the mirror from the dresser, and relocate it to the wall below the big window.
  7. Re-do or replace the current lamps with something. Hanging lamps? Chandeliers? More lamps? Wall sconces? Who knows?
  8. Replace the ceiling fan. The light kit hasn't worked since we moved in, and it kinda sucks to not have an overhead light in this room.
  9. Purchase a wireless router for the computer (the only internet connection is in this room) and relocate the computer elsewhere in the house. Or just to the other interior wall in the room.
  10. Paint the other 3 walls in the room a creamy white.
  11. Paint the doors & trim. None of the doors or trim in the house have been painted since the house was built in 2003. With dirty boys, dogs, and being, oh, the fifth family to occupy the house, they are pretty beat up, dirty & dingy!
  12. Create a small sitting area across from the bed. There's just enough room for this if I keep the scale down. I've always wanted a nice little spot to sit in my bedroom. Ideally, I'd be able to move my bookcases up here (repainted & beautified of course!) and make a little library seating area. Not sure how The Man is going to feel about that though. He's not sold on the seating area yet as it is!
Here is my inspiration board for this gargantuan, most likely year-long, project.

Master Bedroom

How cool is that brass lamp?  Now, I'm not normally a fan of brass, but this lamp happens to look like ammo, and if there's one thing The Man loves, it's guns & ammo.  I've discovered that you can buy a kit for ceiling fans to make them accept pretty chandeliers.  Imma hafta get me one!  The slipper chair is from World Market, and is a smaller scale to work with the dimensions of the room.  My vanity and our bedroom furniture will be going white, with dark stained tops on the dresser and vanity.  Oh!  And here is part of the art, already done and waiting for me to paint...


One baby step at a time.  Now that I've put all of this out there, maybe I'll have more motivation to actually DO something about it!  Accountability people.  Help a girl out.

Sunday, August 4, 2013

Dealing with funky frames

Did I ever show you the frames I picked up earlier this summer?  Yard sale find, solid wood, 25 cents each.  But of course, I failed to note the size of the openings (10x12 and 10x11), and, when I got home, had nothing to put in them!

Fast forward a couple of months.  I've painted the dingy frames bright white, and called upon Costco Photo Center to fill those pretties.  I chose 4 vintage advertising posters, and had them printed up in 8x12.  Cost me all of about 3 bucks, and they were ready at my local warehouse in about an hour.

Then the prints languished in a folder, next to the disassembled frames, for several months.  I just couldn't figure out what to do about the empty space.  I could have matted them, though that would have required covering parts of the prints.  So that was out.  I thought about painting the backer boards, but they were just heavy cardboard, and I knew they'd curl up like a cooked shrimp as soon as any paint hit them.  So, we waited.

Until yesterday, when the angels sang from the office supply aisle at the DollarTree.  Foam core!  It was exactly the depth I needed to fill the back of the frames, and I could get four from one sheet.  SOLD!

I hauled that thing home, and laboriously cut (anything done with the help of a 3-year-old is laborious) four backers.  But I wasn't loving the white.

Remember the mixed silver craft paint from the pillars?  Yeah, it called me again.  I used a crusty old sponge brush to dry-brush the outside 2-inches of the long sides of each board.  Because I was dry brushing, the paper did not curl or soak up a bunch of paint, and I could really work the medium, getting a nice, matte sheen, while covering the white completely.

Then it was just a matter of centering my print over the foam core, and pressing the whole thing into the frame.

Some of my frames still had the staples, so I used those to hold the core in where I could.  And, because I'm lazy, the frames that did not have staples got a few lengths of FrogTape along the edges.  With the foam core, the frames are actually lighter than they were before, so I'm not too worried about things falling out.


They are really crappy cell-phone photos (dang camera battery won't hold a charge!), but you get the idea.  I had originally planned to put these in the great room, but I think they will be awesome in the master once we get the room painted.  I love all the blues, and just those few pops of orange & coral.  I think they'll be perfect.

If you are wondering what happened to the fourth frame, it defected.  I found an incredible vintage firefighter graphic, and just had to have it.  Since The Man is a (former) firefighter, we are doing up the large wall in the great room with his memorabilia.  I'm about to tear it all down and re-do, since I scored those yard sale ledge shelves, and we found his vintage alarm bell (it was in the attic at the parents' house).  My mom also gifted me a few vintage finds from her stash of grandma's stuff, so, this wall is going to be in transition very soon!

Yes, it really is that toasty brown color.  I live in a loaf of bread.

(Just ignore the fact that nothing is centered on this wall...there are two matching windows flanking, with the couch dead center.  The ceilings in here are really high, and I haven't decided on window treatments yet.)

Thanks so much for stopping by!

*disclaimer: I was not paid or given product by either Costco or FrogTape.  I doubt they know I exist, I just love their products!

Saturday, August 3, 2013

More inspiration boards!

I just love playing around with my Olioboards.  It's an easy way for me to pair photos of my own stuff, with gorgeous things I'd like to have in my spaces.  Take a gander at my dining room inspiration

Dining Room 2

Or how about a little family room action?

Fabulous Family Room

Give it a try, its FREE.  And you all know how I feel about free :)

A quick makeover with BIG impact

I've had these two pillar candle holders kicking around for years and years.  They've moved several times, and have just gotten kind of beat up in the process.

They were ok as they were, but, since I'm so surrounded by brown all the time, I thought I could brighten them up a bit.  Here is where we started, brown and goldy-bronzey:

Ignore the hot mess of my kitchen in the background.  And Stanky's breakfast...I felt crafting was a better use of my time today!
And here is where we ended up...even my guys like them!  
Obviously, we haven't painted the hallway yet.  BROWN.

Crisp paint lines, thanks FrogTape!

I used my trust FrogTape(TM) to cover all of the goldy-bronze bits.  It took some doing, as my tape was too wide, but I'm a use-what-you've-got kinda girl!  


Once it was all taped off, I could really get in those tight joints with my detail brush.  Otherwise I just used a cheap foam brush and white acrylic craft paint.  Because they were so dark, and I skipped primer, it took about 6 thin coats of the acrylic.  BUT, that allowed the grain of the faux leather to really pop, and I like the texture the foam brush left behind.

I was tempted to call it good once the white dried, but, I had two bottles of silver craft paint calling me.  I just mixed Pure Silver (a little darker & more aged) and Silver Anniversary (very metallic/high sheen) 50/50, then pounced it over the raised details with my detail brush.  For the smooth sections, I just dry-brushed some of the silver paint over the bronze to get a really cool mixed metal effect.

For ZERO dollars, I've got two brand spankin new pillar holders.  Which means I've got to find a better place for them than the bottom of the pantry...


Look at those crisp paint lines!  Thanks FrogTape!


Wednesday, July 31, 2013

No fun stuff, but the To-Do list is coming along

I don't even have a photo for you today.  Just a story about a guy afraid of electricity, who got all Rambo-ballsy and changed out light switches and fixtures without flipping breakers.  Yeah.  That really happened!

Now that we've mostly caught up on our sleep after the 2 weeks of VBS craziness, we are getting a few more things done around the house.  Last week, one of the boys noticed that the light switch in the downstairs powder room was sticking.  Then, the light fixture in the pantry died.  What's a girl to do?

Go shopping in Papa's Garage, that's what!  I was all set to schlep my guys over to the awesomeness of the ReStore.  Then I took the boys swimming at Nana & Papa's house.

You know those times when you mention a project (or three) and the person you are talking to says they 'might have something that will work for that'?  Totally happened.  My parents have been doing tons of work on their house over the last year, and have kept absolutely everything.  My dad even tries to play like he has some sort of elaborate stocking system for all the junk.

So, we headed over to section E (for electricity, duh!), drawer 1, row 3, slot 7.  I'm serious, we did!  And there laid two shiny new paddle switches.  Bright white, just like I wanted.  Score #1!  Unfortunately, there were no cover plates, but hey, who doesn't love a quick run to Lowes?

After some rummaging around, Dad also came up with the light fixture that formerly crowned the soffit above the kitchen sink.  It's nothing fancy, just a brass plate & ring, white glass shade, but, it was FREE, and it WORKS.  And it's way brighter than the old flourescent circle crap light that was in there before!  Score #2!

I also got to check out the new cabinets in the garage.  One of which is full of extra paint, stain, poly & laquer.  And I've got a free ticket to swipe!  Potential Score #3 + infinity!  (Because paint is my friend, and my kryptonite).

So, The Man switched out the switches (he wasn't sold on the paddle style when he installed them, but now he wants to change out the whole house!) in the bathroom, so no more sticky switchy.  Cost us a whole $2 for the new plate.  Maybe  even less.

Then he installed the light in the pantry.  And guess what?  This guy, this guy who hates when I paint things, he said (gasp & sigh) HE SAID, "well hon, it looks ok, it's brighter and nice, but maybe we can paint it later.  I don't like the brass."  SQUEEEEEAAAALLL!  I get to paint it, I get to paint it (insert booty-shake dance here). 

Oh, we did one other thing.  I had the boys start distressing their soon-to-be towel rack.  Stanky got a bit over zealous and cracked the thing right down the center length.  But it's ok!  I'll work with it, and call it a faux live-edge.  Just needs a little sanding, then I'm off to pillage the stain cabinet!

Wednesday, July 24, 2013

Project In Progress - Boys' Bathroom

Ahh, the boys' bathroom.  Sometimes, it's less like a bath than it is a cesspool, but whatevs.  My guys have been living with this particular nekkid room for almost a year now...


Yes, those are underwear hanging from the shower door.  Keeping things real.

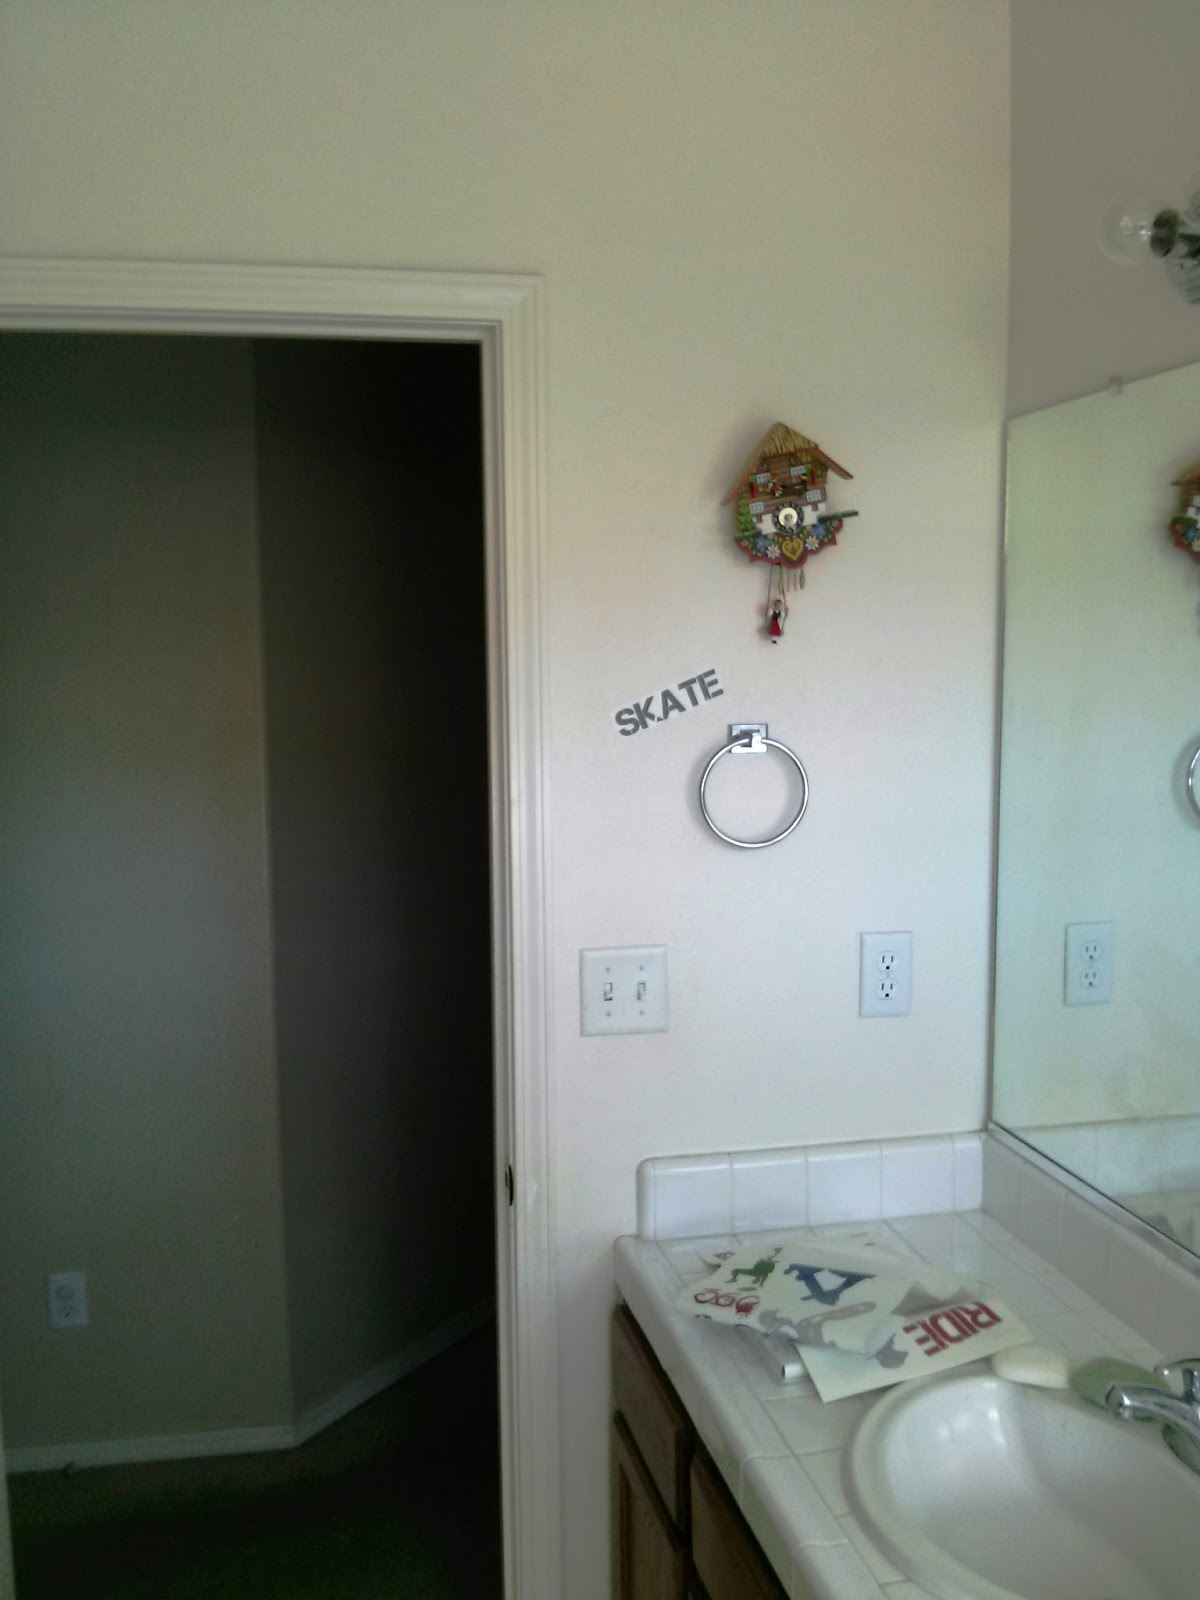
Who hangs a towel ring that high?  And what do you think of that cute little German clock?  Tres Manly, no?

Yes, that is a sparkly, fishy shower curtain, with fish hooks.  Yes, there is underwear hanging on the shower door.  Towels do not usually get hung up in here, because the cheap-o towel bar on the wall falls apart when you look at it.  Much better suited to impromptu semi-naked sword fighting.

In short, a room in desperate need of a little something.  White walls, ivory tile, and chrome.  Blah, blah, blech.

A while back, I may have mentioned that I won some AWESOME RoomMates Decor wall decals from Kim at Reposhture.  Or maybe not.  It happened in May, and I let them sit around for quite a while! 

The lovely people from RoomMates allowed me to have two sets of the decals I chose.  Since I knew I wanted these for the boys' bathroom update, I chose the Extreme Sports themed wall decals, because, well, it's one thing all 3 boys agree on! 

Here are a few shots of the application process, which was extremely simple, just peel carefully, and STICK!
My little helper.  He insisted that an entire sheet of decals be pasted right there. 
And was not happy to have his picture taken!

Another helper. 

Is it just me, or is it very obvious which decals were placed by the boys?

I really need to move that towel ring!

This bathroom feels cavernous, what with the stark white walls and 10-foot ceilings.  But, with the strategic application of some color, it feels less like a big white hole in the hallway, and more like a place to get things done.  You know, like, washing, brushing & flushing.

We have a looong way to go in here, but things are moving along.  Stil on our To Do List:
1.  Replace the teensy cheap towel bar with something big & manly. 
2.  Frame the mirror (I'd love to pretty much cut it in half, but the landlord isn't so keen on that idea!)
3.  ORB the shower door frame & sink fixtures - this is a BOY bathroom - all that chrome is always dirty!
4.  New rugs - I already scored some dark red towels for in here. 
5.  Figure out a solution for hanging art over the toilet.  It will be hung on the mirror...I'm stumped!

I can tell you that quite of few of these (thankfully!) repositionable decals will be moving around when we install our DIY Towel Rack.  This is a project the whole family is getting in on, and I'm hoping it turns out half as well as it looks in my mind!  Here are a couple of inspiration shots from my Pinterest Boards:

 
Source


Happy Creating!