I don't even have a photo for you today. Just a story about a guy afraid of electricity, who got all Rambo-ballsy and changed out light switches and fixtures without flipping breakers. Yeah. That really happened!
Now that we've mostly caught up on our sleep after the 2 weeks of VBS craziness, we are getting a few more things done around the house. Last week, one of the boys noticed that the light switch in the downstairs powder room was sticking. Then, the light fixture in the pantry died. What's a girl to do?
Go shopping in Papa's Garage, that's what! I was all set to schlep my guys over to the awesomeness of the ReStore. Then I took the boys swimming at Nana & Papa's house.
You know those times when you mention a project (or three) and the person you are talking to says they 'might have something that will work for that'? Totally happened. My parents have been doing tons of work on their house over the last year, and have kept absolutely everything. My dad even tries to play like he has some sort of elaborate stocking system for all the junk.
So, we headed over to section E (for electricity, duh!), drawer 1, row 3, slot 7. I'm serious, we did! And there laid two shiny new paddle switches. Bright white, just like I wanted. Score #1! Unfortunately, there were no cover plates, but hey, who doesn't love a quick run to Lowes?
After some rummaging around, Dad also came up with the light fixture that formerly crowned the soffit above the kitchen sink. It's nothing fancy, just a brass plate & ring, white glass shade, but, it was FREE, and it WORKS. And it's way brighter than the old flourescent circle crap light that was in there before! Score #2!
I also got to check out the new cabinets in the garage. One of which is full of extra paint, stain, poly & laquer. And I've got a free ticket to swipe! Potential Score #3 + infinity! (Because paint is my friend, and my kryptonite).
So, The Man switched out the switches (he wasn't sold on the paddle style when he installed them, but now he wants to change out the whole house!) in the bathroom, so no more sticky switchy. Cost us a whole $2 for the new plate. Maybe even less.
Then he installed the light in the pantry. And guess what? This guy, this guy who hates when I paint things, he said (gasp & sigh) HE SAID, "well hon, it looks ok, it's brighter and nice, but maybe we can paint it later. I don't like the brass." SQUEEEEEAAAALLL! I get to paint it, I get to paint it (insert booty-shake dance here).
Oh, we did one other thing. I had the boys start distressing their soon-to-be towel rack. Stanky got a bit over zealous and cracked the thing right down the center length. But it's ok! I'll work with it, and call it a faux live-edge. Just needs a little sanding, then I'm off to pillage the stain cabinet!
Wednesday, July 31, 2013


Wednesday, July 24, 2013
Project In Progress - Boys' Bathroom
Ahh, the boys' bathroom. Sometimes, it's less like a bath than it is a cesspool, but whatevs. My guys have been living with this particular nekkid room for almost a year now...
Yes, that is a sparkly, fishy shower curtain, with fish hooks. Yes, there is underwear hanging on the shower door. Towels do not usually get hung up in here, because the cheap-o towel bar on the wall falls apart when you look at it. Much better suited to impromptu semi-naked sword fighting.
In short, a room in desperate need of a little something. White walls, ivory tile, and chrome. Blah, blah, blech.
A while back, I may have mentioned that I won some AWESOME RoomMates Decor wall decals from Kim at Reposhture. Or maybe not. It happened in May, and I let them sit around for quite a while!
The lovely people from RoomMates allowed me to have two sets of the decals I chose. Since I knew I wanted these for the boys' bathroom update, I chose the Extreme Sports themed wall decals, because, well, it's one thing all 3 boys agree on!
Here are a few shots of the application process, which was extremely simple, just peel carefully, and STICK!
This bathroom feels cavernous, what with the stark white walls and 10-foot ceilings. But, with the strategic application of some color, it feels less like a big white hole in the hallway, and more like a place to get things done. You know, like, washing, brushing & flushing.
We have a looong way to go in here, but things are moving along. Stil on our To Do List:
1. Replace the teensy cheap towel bar with something big & manly.
2. Frame the mirror (I'd love to pretty much cut it in half, but the landlord isn't so keen on that idea!)
3. ORB the shower door frame & sink fixtures - this is a BOY bathroom - all that chrome is always dirty!
4. New rugs - I already scored some dark red towels for in here.
5. Figure out a solution for hanging art over the toilet. It will be hung on the mirror...I'm stumped!
I can tell you that quite of few of these (thankfully!) repositionable decals will be moving around when we install our DIY Towel Rack. This is a project the whole family is getting in on, and I'm hoping it turns out half as well as it looks in my mind! Here are a couple of inspiration shots from my Pinterest Boards:

Happy Creating!
 |
| Yes, those are underwear hanging from the shower door. Keeping things real. |
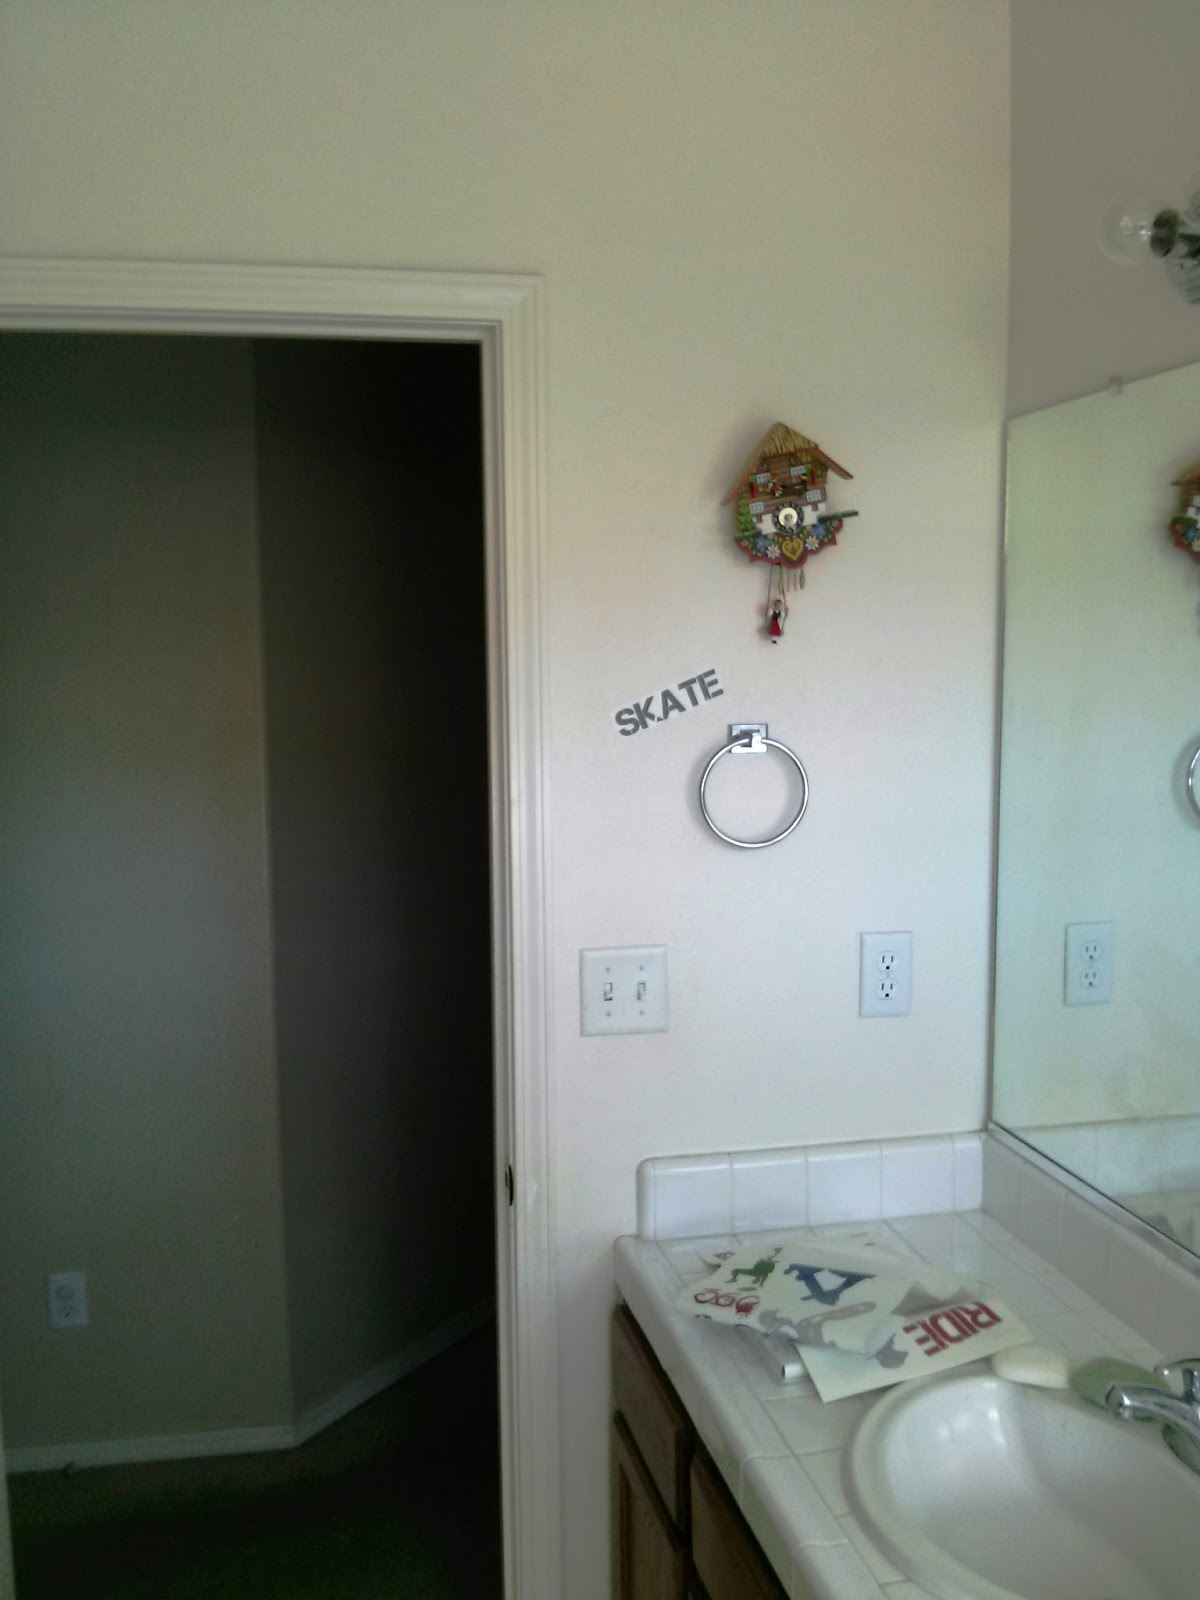 |
| Who hangs a towel ring that high? And what do you think of that cute little German clock? Tres Manly, no? |
Yes, that is a sparkly, fishy shower curtain, with fish hooks. Yes, there is underwear hanging on the shower door. Towels do not usually get hung up in here, because the cheap-o towel bar on the wall falls apart when you look at it. Much better suited to impromptu semi-naked sword fighting.
In short, a room in desperate need of a little something. White walls, ivory tile, and chrome. Blah, blah, blech.
A while back, I may have mentioned that I won some AWESOME RoomMates Decor wall decals from Kim at Reposhture. Or maybe not. It happened in May, and I let them sit around for quite a while!
The lovely people from RoomMates allowed me to have two sets of the decals I chose. Since I knew I wanted these for the boys' bathroom update, I chose the Extreme Sports themed wall decals, because, well, it's one thing all 3 boys agree on!
Here are a few shots of the application process, which was extremely simple, just peel carefully, and STICK!
 |
| My little helper. He insisted that an entire sheet of decals be pasted right there. And was not happy to have his picture taken! |
 |
| Another helper. |
 |
| Is it just me, or is it very obvious which decals were placed by the boys? |
 |
| I really need to move that towel ring! |
This bathroom feels cavernous, what with the stark white walls and 10-foot ceilings. But, with the strategic application of some color, it feels less like a big white hole in the hallway, and more like a place to get things done. You know, like, washing, brushing & flushing.
We have a looong way to go in here, but things are moving along. Stil on our To Do List:
1. Replace the teensy cheap towel bar with something big & manly.
2. Frame the mirror (I'd love to pretty much cut it in half, but the landlord isn't so keen on that idea!)
3. ORB the shower door frame & sink fixtures - this is a BOY bathroom - all that chrome is always dirty!
4. New rugs - I already scored some dark red towels for in here.
5. Figure out a solution for hanging art over the toilet. It will be hung on the mirror...I'm stumped!
I can tell you that quite of few of these (thankfully!) repositionable decals will be moving around when we install our DIY Towel Rack. This is a project the whole family is getting in on, and I'm hoping it turns out half as well as it looks in my mind! Here are a couple of inspiration shots from my Pinterest Boards:
 |
| Source |

Happy Creating!
Monday, May 20, 2013
Yard sale me this
Saturday, I went yard saling for the first time in a very, VERY long time. It was glorious!
I did some homework and mapped out a route of sales I'd hoped to visit. First off was just down the street, in a gated community. Scored a few things there...
Stopped by a church rummage sale I noticed on the way. Scored 1 thing, but hey, it goes to their Jr. High camp fund, so it was worth the stop.
Headed out to my second destination, but got detoured by a lovely sign proclaiming an ESTATE SALE in an upscale neighborhood. Even though I was almost an hour late to the party, there was some lovely stuff there! I scored a vintage pyrex, some vintage teacher's shears, a wicker magazine basket, and a GORGEOUS vintage gallery frame, that was already naturally chippy and worn-in. Yes, the man in my life rolled his eyes when he saw it. To him, it's just broken. To me, it's just waiting for me to love it.
Getting out of that neighborhood was tricky, and I was seduced into several drive-bys and a couple more stops. Once I finally got out of that maze, I found myself two blocks from my second listed stop anyway. Found a cute little brass pot there.
It was just hitting 8 am, and I knew there was one more stop I wanted to make Fo Sho, at a sale that started at 8. I'm so glad I went! I'd been searching high and low, near and far, for an old Coca-Cola bottle crate that would not dent my wallet. And I totally found it! It's going to have a new life in one of the boys' rooms. I also found an incredible little mirror...they were still clearing the garage when the sale started, but, I had limited myself to $20 and an hour. I didn't hit my dollar limit, but I did hit my time limit.


All of those photo frames are 10x12, and solid wood, some with brass. They have all been given some new life with a coat of white craft paint. Of course, I realized they were'nt 8x10 a little late in the game, but I've come up with an easy, no-cost fix for that so I can use them as I intended, for my 8x10 art! Stay tuned.
I did some homework and mapped out a route of sales I'd hoped to visit. First off was just down the street, in a gated community. Scored a few things there...
Stopped by a church rummage sale I noticed on the way. Scored 1 thing, but hey, it goes to their Jr. High camp fund, so it was worth the stop.
Headed out to my second destination, but got detoured by a lovely sign proclaiming an ESTATE SALE in an upscale neighborhood. Even though I was almost an hour late to the party, there was some lovely stuff there! I scored a vintage pyrex, some vintage teacher's shears, a wicker magazine basket, and a GORGEOUS vintage gallery frame, that was already naturally chippy and worn-in. Yes, the man in my life rolled his eyes when he saw it. To him, it's just broken. To me, it's just waiting for me to love it.
Getting out of that neighborhood was tricky, and I was seduced into several drive-bys and a couple more stops. Once I finally got out of that maze, I found myself two blocks from my second listed stop anyway. Found a cute little brass pot there.
It was just hitting 8 am, and I knew there was one more stop I wanted to make Fo Sho, at a sale that started at 8. I'm so glad I went! I'd been searching high and low, near and far, for an old Coca-Cola bottle crate that would not dent my wallet. And I totally found it! It's going to have a new life in one of the boys' rooms. I also found an incredible little mirror...they were still clearing the garage when the sale started, but, I had limited myself to $20 and an hour. I didn't hit my dollar limit, but I did hit my time limit.


All of those photo frames are 10x12, and solid wood, some with brass. They have all been given some new life with a coat of white craft paint. Of course, I realized they were'nt 8x10 a little late in the game, but I've come up with an easy, no-cost fix for that so I can use them as I intended, for my 8x10 art! Stay tuned.
Thursday, May 9, 2013
$10 Photo Gallery, with a twist
I was recently (ok it's longer than recently, but who's counting?) browsing through Pinterest, and was inspired by this post:
 |
| http://www.craftaholicsanonymous.net/33-ideas-to-display-school-photos |
Cute huh? I thought so.
So, a few weeks ago I happened to be in JoAnn's. They were having a sale on their craft letters, and I picked up this large W. This was a HUGE score, because they were on sale for 40% off, and, because it was slightly damaged, I ended up getting it for 60% off! Can't beat $3.50 for a 2-foot tall letter. Sorry, but you just can't.
Now I'll be honest and tell you that this thing floated around the house for WEEKS. Seriously. I lost count of the times I yelled at the boys to leave it alone, for fear of them bending it in half or otherwise mauling beyond repair. They have a history y'all.
I decided to paint the sides with my prize MyColor by Pantone paint in Medieval Blue. It's a deep cobalt, and I adore it. I actually won some samples of three colors from MyColor by Pantone last year, and had not yet used the Medieval Blue. It ended up being the perfect compliment to my photos, and just the pop of color I was hoping for.
Now, none of my projects would be complete without accompanying disparaging remarks from the men in my life. I received various versions of 'Wow, that looks like crap!' while painting the sides. It seems that, despite my years of painting, I've been unable to convey the idea that, it's always going to look worse with one coat of paint before it looks better.
For the photos, I just dumped a bunch of my favorites into a separate folder on the computer, then played with color and focus for a while. I wanted pops of blue and a smidge of green, so the photos that had that received a soft-focus watercolor treatment to mute the colors a bit. Everything else went black and white. Then I simply printed them out wallet size and cut them out. And YES, I did manage to find some snaps with me in them, and I did include those, butt-crack-hair and all.
As I was painstakingly determining optimum placement of each cherished memory, my oh-so-helpful hubby sauntered by with a snide 'Uh, you're going to trim those I hope.' Nope, I thought I'd just lay them out willy-nilly and make my 2-week paint job look like crap. Geez, MEN! LOL
I just used some watered-down school glue, foam brush and my fingers to adhere the photos. Just glob some on the monogram, smoosh the photo into it and use your fingers to moosh the excess squishing out the sides around and over the front. Once you've got a dry surface, you can either coat with another layer of the glue, or spray with poly. I chose to use some archival-quality spray poly I had lying around. I can't even remember where I got it, or what brand it was (probably because I snitched it from the parent's garage!).
Once it was all said and done, everyone decided this was one of my cooler projects. The boys fought over the leftover photos; Stanky is still convinced that the baby pic of his big brother is their cousin Bobble.
So, here's the photobomb - thanks Stanky. Not only did he bomb the photo, but the focus changed at the last second and blurred out my masterpiece!

 |
| They all decided to get in on the action. Stamped faces, kabob skewers and all. |
Updated, slightly nicer photos (stuck with the cell-phone peeps), without the minions...


Now, do you remember this table from last August's Swap Meet? Yeah, I've been sanding when I feel like it, and moving it from one house to another, in the hopes of being stricken with inspiration. I think it was that awful textured tray top that stumped me. After days and days (yes, all those hours added into days!) of sanding and filling and sanding and filling and sanding and crying because it still sucked...
Well folks, inspiration struck, and she don't look like dis no mo!

Stay tuned for the reveal...I'm keeping this one!
Sharing this week over at


border="0"/>
Wednesday, March 13, 2013
Down Home Wine Glasses
A few weeks ago I went on a church retreat to the local mountains. On the way back, my mom and I and two ladies from church decided to stop and browse an antiques market, where mi madre spied a set of jar wineglasses. She absolutely HAD to have some, until we noticed that they were $10 each!
I told her I'd make her some for WAAAAY cheaper. And lo & behold, I actually did it! And within a reasonable amount of time! See, sometimes I can finish a project quickly.
Here is what you need:


I told her I'd make her some for WAAAAY cheaper. And lo & behold, I actually did it! And within a reasonable amount of time! See, sometimes I can finish a project quickly.
Here is what you need:

I picked up a case of Ball canning jars at OSH during their 'We pay the sales tax' weekend. I think the whole case cost me 12 bucks. While I was there, I grabbed a tube of E6000 adhesive. Then I walked all of 50 yards down the sidewalk to the Dollar Tree where I cleaned them out of glass candlesticks. So, I'm up to about $23 worth of stuff.
Truly one of the easiest DIYs to date for me (besides the hokey Valentines door-hangers). I did wipe the tops of the candlesticks and bottoms of the jars with rubbing alcohol before giving them a quick sandpaper massage to ensure good adhesion.
Followed the directions on the adhesive, married the two pieces and VOILA! Redneck/Okie/Down-Home-Country Wine Glasses!

I did let the adhesive cure overnight with a weight on top as per the instructions. But I was able to throw them in a basket and give them to mom at church last Sunday - she was so surprised!
This entire project cost me less than $25. I gifted 6 glasses to my mom, and plan to sell the other set of 6 for $30 to cover costs. And that is still half the asking price of any others I've seen lately ($10 each? Really? It took me like, a minute to do each glass.)
This entire project cost me less than $25. I gifted 6 glasses to my mom, and plan to sell the other set of 6 for $30 to cover costs. And that is still half the asking price of any others I've seen lately ($10 each? Really? It took me like, a minute to do each glass.)
Saturday, March 9, 2013
New projects!
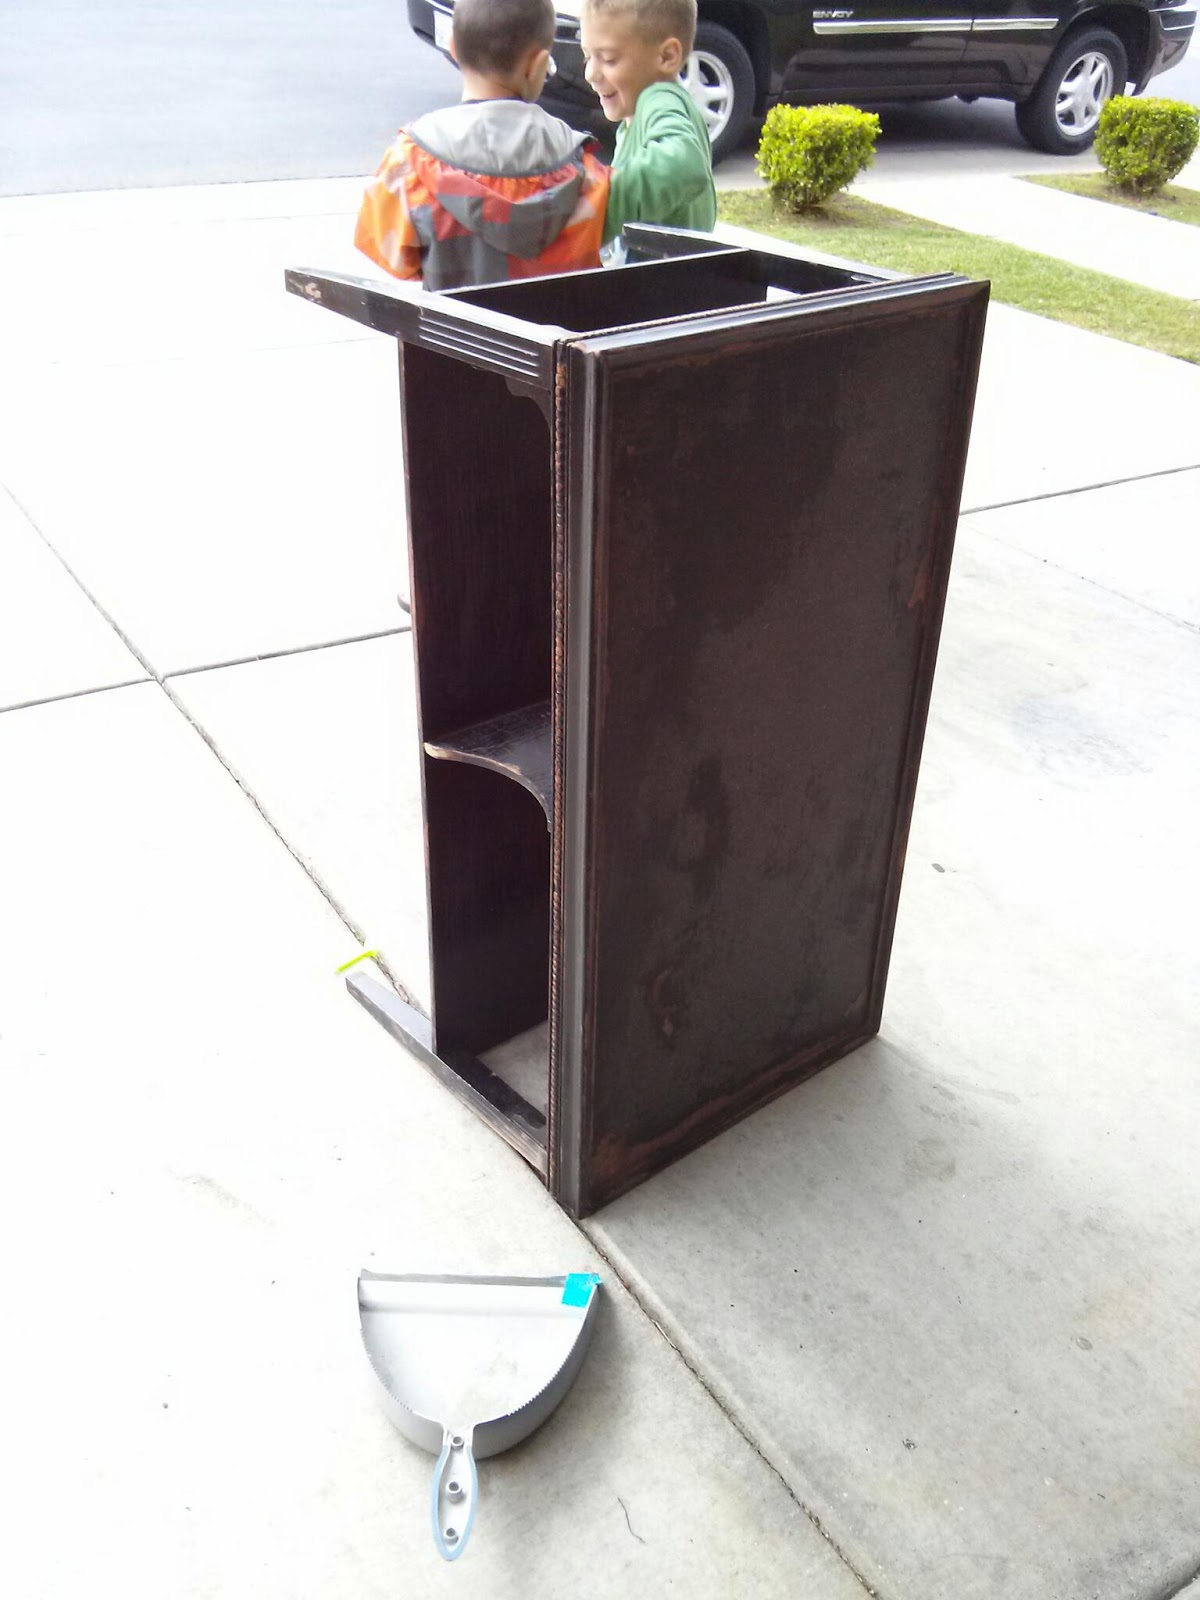
3 projects in the works. The cocktail table I thrifted last August, a recent find, and some mason jar magic.
Yes, all but one photo is sideways. Shelf is clamped for veneer repair, and the boys were supposed to be wiping down the table.
See you all soon!


Tuesday, February 26, 2013
I've got nothing
Been in a bit of a crafty desert lately, what with the kids' school, and work, and church.
Pretty much all I've been doing is making and buying things for the church nursery. Oh! I've taken over the nursery at our church. I'm smack in the middle of trying to revamp that space, and time is a very precious commodity around here. Do you all KNOW how long it takes to make flowers out of 160 dollar tree coffee filters?! A LONG TIME. Because I started weeks ago and am still not done yet.
But rest assured, I WILL have something to share. One day, when my eye stops twitching and my fingers can type more than 100 words without cramping...
Pretty much all I've been doing is making and buying things for the church nursery. Oh! I've taken over the nursery at our church. I'm smack in the middle of trying to revamp that space, and time is a very precious commodity around here. Do you all KNOW how long it takes to make flowers out of 160 dollar tree coffee filters?! A LONG TIME. Because I started weeks ago and am still not done yet.
But rest assured, I WILL have something to share. One day, when my eye stops twitching and my fingers can type more than 100 words without cramping...
Subscribe to:
Posts (Atom)